The Fader 5th Anniversary Release

TuomiojärviThe Fader is easily the most popular of my Lightroom plugins. It is also one of the oldest ones. In fact, the first release was published on September 29th, 2010, which makes it exactly five years old!

The plugin was born from my personal need. I wanted to tone down some presets that I had created, but adjusting 100+ sliders was really complicated, even though I am fairly proficient with Lightroom. The Fader hides all the complexity of different sliders under single, easily understable slider interface.

Over the years, it has gained a lot of more features. The current version also adjusts strength of gradient filters, radial filters and smoothly blends between different RGB Tone Curves!

So, let’s celebrate the anniversary with some special announcements!

Firstly, there is a new release available with version number 1.0. After 160 releases, I guess it is time to call it a complete piece of work. And don’t worry, I’m not stopping development!

Secondly, the new release finally has a fix for Lightroom GPU issue, where the large photo view would not update when tone curves were applied. It is a bug in Lightroom, but I have managed to workaround it.

Thirdly, the registration to full version is now only $4.99 until end of October! (-50% off from regular price of $10.00). You can register the plugin after installing in LR Plugin Manager, the Paypal transaction ID in your receipt is the registration code). The registration is valid for life, for all upcoming updates.

Download

Get The Fader

The Fader 0.8.1122

The Fader is Adobe Photoshop Lightroom plugin for adjusting develop preset strength with a single slider

This release contains new preference for defaulting to “zeroed” preset, this allows you to
rapidly fade out too excessive presets. It is also shown first time for new users until the
first preset is selected. I hope this helps you if you are starting with The Fader.

Splashing wave

Additionally, there is now support for LR6.1 features, such as fading crop settings and dehaze slider value.

Download

Download thefader_r1122.zip

NOTE: Lightroom 6.x has issues when GPU rendering is enabled. If preset contains tone curves, the develop photo view does not update properly (smaller navigator windows does update). The work around is to click slider second time.

Changes in version 0.8.1122

  • On first run, autoselects Zeroed preset (plus preferences option)
  • LR6: Added support for Dehaze slider (new in LR 2015.1 release)
  • LR6: Added ability to fade Crop settings

The Fader 0.8.1034

AurinkosähköäLightroom CC (or 6.0) was just released and one of the biggest (only?) change is support for GPU processing. Initially, I thought that The Fader worked fine, but after some testing I noticed a side effect when GPU is enabled. The develop view did not refresh correctly, it took two adjustments to make the view refresh.

Luckily, LR6 also seems to support new API features, but these are currently not documented. I took the time to figure out some of the new API and using this new API fixed the LR6 GPU issue and additionally it is slightly faster.

Download

Download thefader_r1071.zip

NOTE: Lightroom 6.x has issues with GPU rendering enabled. If preset contains tone curves, the develop photo view does not update properly (smaller navigator windows does update). The work around is to click slider second time.

Changes in version 0.8.1071

  • Workaround for LR6 API issues with multiple settings not updating in loupe correctly
  • Workaround for LR6 API issues with different process versions
  • Using new API provided by Lightroom 6

11 Ways to Desaturate in PhotoShop

There is an old saying that PhotoShop always has three ways to do a given task. Three only? That sounds like a low estimate. I’m currently working on a programming project where I’d like to replicate some results from PhotoShop, so I started with simple task – desaturating an image – converting color photo as black & white.

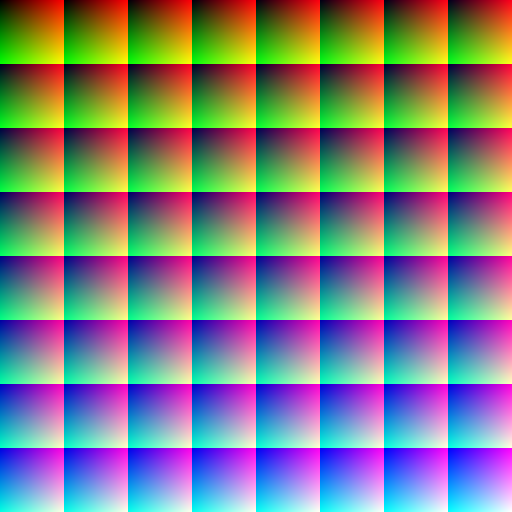
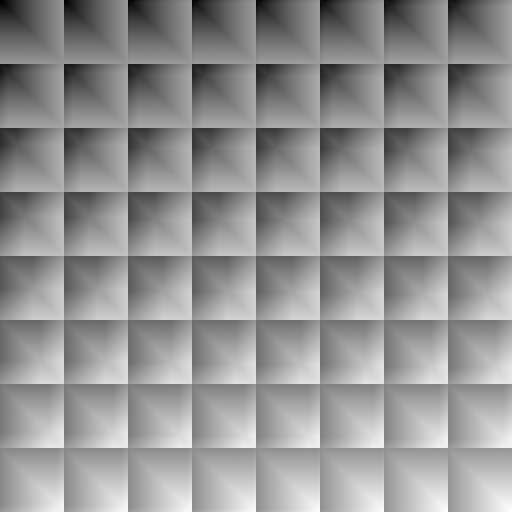
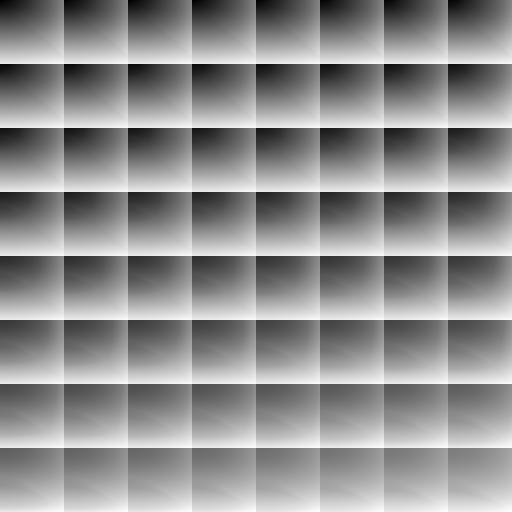
In the following examples, I’m using color test pattern from GPUImage. It contains 64^3 pixels, organized in a grid. It is originally designed for color lookup, but as it visualizes the differences quite nicely, I decided to use it here. Here’s the original pattern looks like this:

psdesat_0011_Background

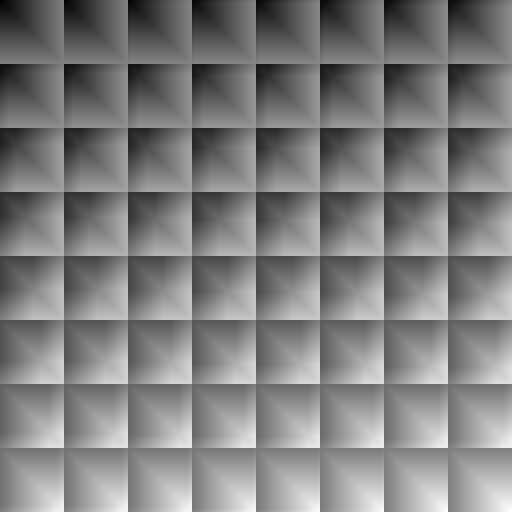
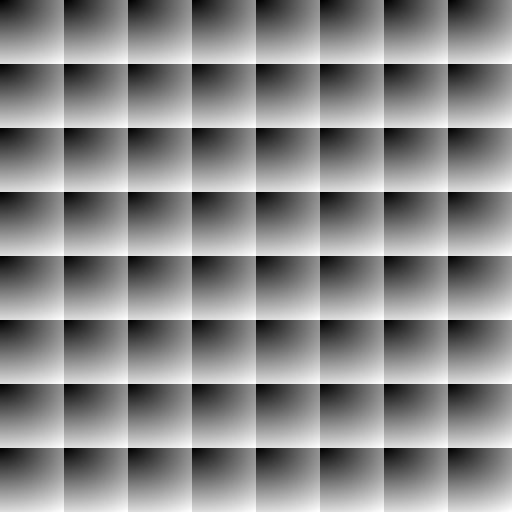
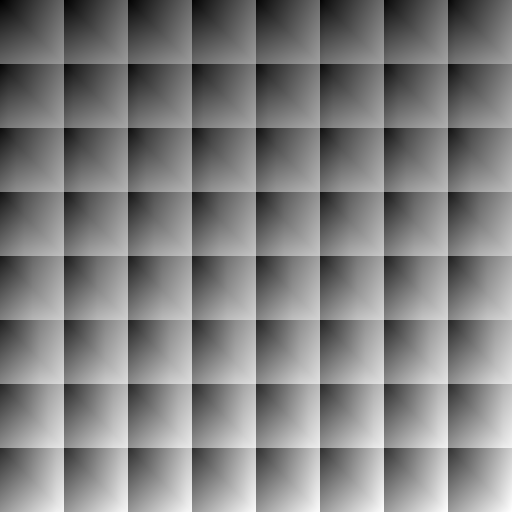
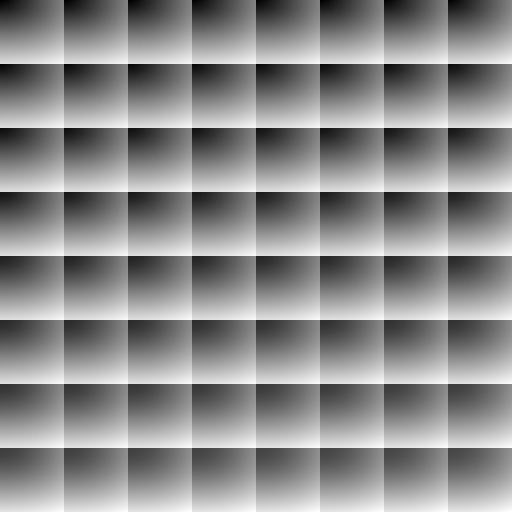
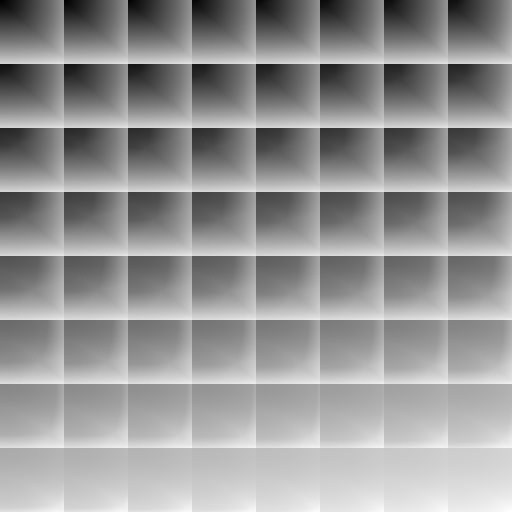
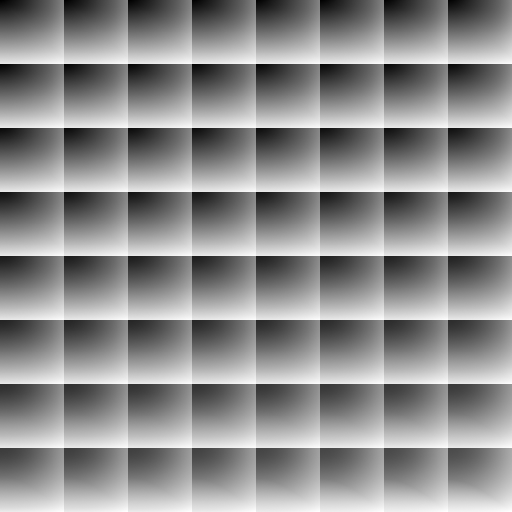
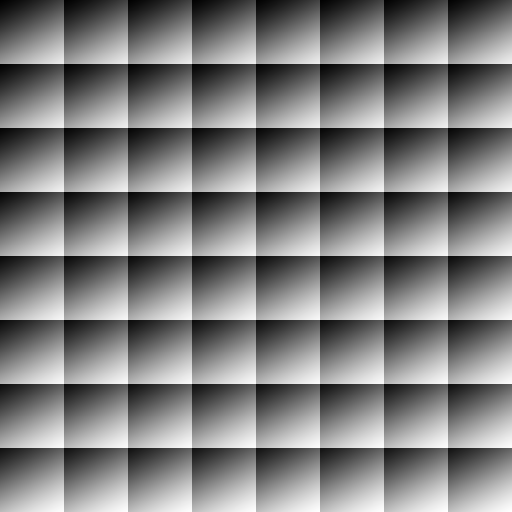
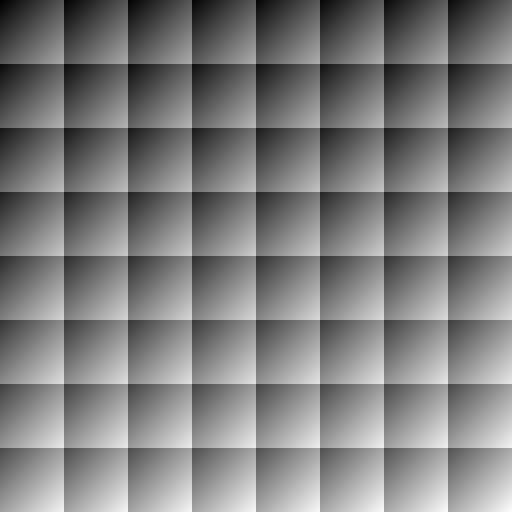
Next, the B&W conversions. Pay attention to hue changes and smoothness of the gradient.

  1. First, the obvious Image -> Desaturate. Same effect can also be achieved with Hue/Saturation adjustment layer.
    Desaturate
  2. Vibrance/Saturation adjustment produces different look.
    Vibrance/Saturation Adjustment
  3. Black & White adjustment with default settings.
    Black & White Adjustment
  4. Converting to HSL and taking Lightness channel only. This almost same as Desaturate, but it appears slightly lighter.

    Convert to HSL, Lightness channel

  5. Converting to LAB and taking Lightness channel only.

    Convert to LAB, Lighness channel

  6. Image -> Mode -> Grayscale. Very close to LAB, but again there is difference in contrast.

    Grayscale

  7. Camera RAW: HSL Saturation -100
    ACR HSL Saturate -100
  8. Camera RAW: Saturation -100
    ACR Saturation -100
  9. Camera RAW: HSL Grayscale mode with sliders at zero. Note the crude changes in intensity when hue changes.

    ACR Gray Mixer

  10. Gradient Map
    Gradient Map
  11. Channel Mixer all values at 33%
    Channel Mixer 33%

If you know any additional ways that produce different results, please leave a comment!

The Fader 0.8.1028

Take the dog outThis release brings some bug
fixes to fading gradial and radial filters. Lightroom has unique idenfier for each gradient, and now you can fading between different gradients, but if the matching identifiers are considered as same, so you will not got two duplicates.

Additionally, by user request, there is an experimental feature to override fading of gradients. By checking this option, you can combine several filter presets on top of each other (just apply them using The Fader and click OK in between).

Download

Download thefader_r1028.zip

Changes in version 0.8.1028

  • Ability to override local adjustments from photo to allow layering gradients
  • Bugfixes for fading gradients and radial filters
  • Added more fields (e.g. defringe) to Lens Corrections enable toggle

Happy New (Tax) Year 2015!

2014 has been a blast, and I’m looking forward for what will happen in 2015!

One minor announance in between 2014 and 2015 is the new EU VAT legislation.

In 2015, all VAT is now collected in EU customer’s residence country, which requires some changes in plugin registration backend. All the changes are now in production, so we are now fully VAT MOSS compatible.

All EU customers are now charged with their local VAT by their residence as detected by Paypal.

Identifying sensors from Adobe DCP Camera Profiles

Risuaita Telkkämäki

Adobe just released Lightroom 5.7 update, which includes support for several new camera models.

One of the new models is Fujifilm X100T. As I do own the previous X100S model, I was wondering if the new model has a same sensor or if it is different. There’s no way to tell that from specifications, even though it looks very much like same one.

Then I had a out-of-the-box idea: Adobe does supply camera profile for each model, which describes how the sensor image colors map to Adobe Standard colors. Each sensor technology has different profile, and if the color profile matches, the sensor then has similar color rendition and most likely uses the same technology (same CFA, same analog circuitry). Of course, this is only Adobe’s interpretation, but I trust them to have direct communication with the camera manufacturers.

So, here’s a list of duplicate Adobe camera profiles, grouped together by those which are exactly same, apart from the model name. I find it interesting that Canon 6D and 70D have identical colors (while being physically different size) and this seems to confirm that Fujifilm X100S and X100T are indeed the same sensor.

UPDATE Dec 15, 2014

CameraRaw 8.7.1 was just released, which contains new profile for Sony ILCE-7M2 – also known as Sony Alpha 7 mk II. Again, this color profile is identical to previous A7 model.

Continue reading

The Fader 0.8.985

Tourujoen yöThis release fixes issue with linear RGB curves, the previous releases algorithm caused huge colorshift for curves which had non-zero starting points. Thanks for Sarah T. for bringing this issue into my attention.

There are also some other minor improvements, e.g. the sections which do not affect current photo are dimmed (in registered version only).

Download

Download thefader_r985.zip

Changes in version 0.8.985

  • Fixed fading Tone Curves with linear knees
  • Disable section checkboxes with same settings as current
  • Enabled fading in preset gradients even if photo has no gradients
  • Improved Process Version handing by always using preset process version
    when Camera Calibration is enabled

LeakLite 0.4.929

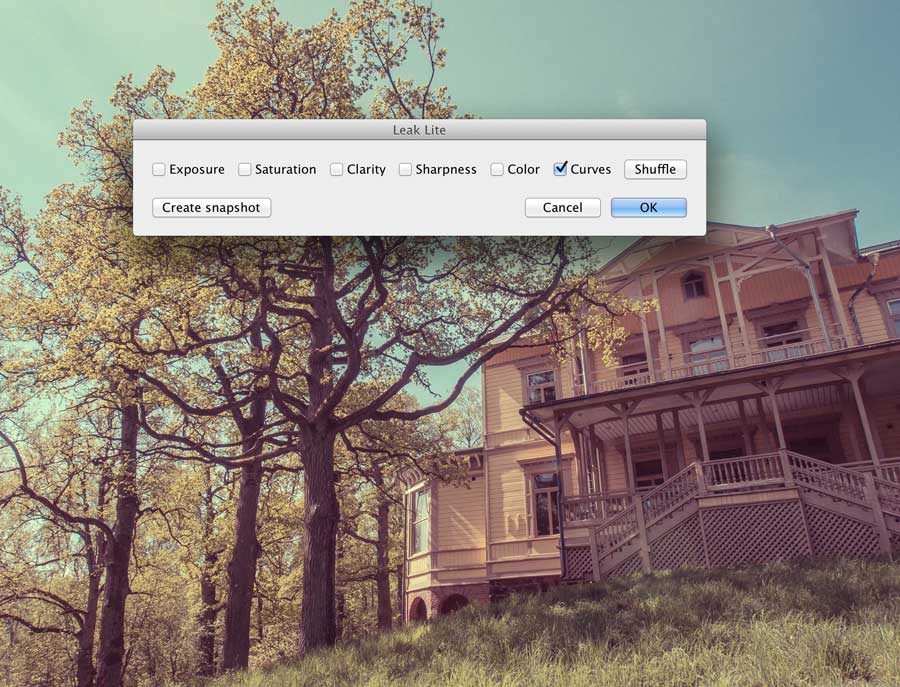
I had an old prototype old randomized RGB color curve generation routine lying around, so I added it into Leak Lite.

It generates separate Red/Green/Blue tonecurves with three points, adjusted by small amount to go a little bit off linear curve, so it looks something like a cross-processing effect. Since you can disable all other effects by unticking the checkboxes, LeakLite now functions as a color preset generator!

Leak Lite dialog

Download

Download leaklite_r929.zip

Changes in version 0.4.929

  • Added shuffled RGB curves
  • Store checkboxes to preferences

The Fader 0.7.918

JuuriaYet another maintenance release with important bug fix for Black and White mixer sliders, which got broken when I added section checkboxes (the B&W slider were not included in the HSL section, as you would have expected).

Additionally, the preset cache is back by user request. I tried several workarounds in order to get Lightroom to load presets faster, but none of them really worked. Now the plugin simply tells you to restart when it detects a missing preset.

There are also some tiny changes here and there, most visible is perhaps the warning sign for incompatible process versions. Earlier this warning sign was displayed only if you were e.g. trying to fade between photo with Process Version 2003 and preset with Process Versions 2012. Now it also displays when trying to fade color image into B&W treatment. For reasons beyond my comprehension, the color sliders in them produce different results, so it is not possible to fade between HSL and B&W mixer sliders. Of course, it is only a warning which you can freely ignore it, if you are interested in some other section values, such as Split Toning.

Download

Download thefader_r918.zip

Changes in version 0.7.918

  • Fixed fading Black & White mix sliders (oops!)
  • Preset caching is back, with preference to disable it and cache flush
    when preset is not found.
  • Added process version warning when fading between color and B&W treatment
  • Added menu keyboard shortcut for Windows (practically useless, but it is there)
  • Workaround for disappearing ampersand characters in pulldown menus

Red/Blue Swap in Lightroom for Infrared Photography

550nm IR filter
Lately, I’ve been interested in infrared photography (I even modified by E-P1 for full spectrum use), and I’d like to share one of my special tricks for other Lightroom users interested in infrared photography.

I have several IR filters for blocking visible lights, e.g. 550nm, 720nm and 950nm filters. The 950nm filter produces grayscale IR images, but the other filters do produce fake colors, which sometimes make the result much more interesting.

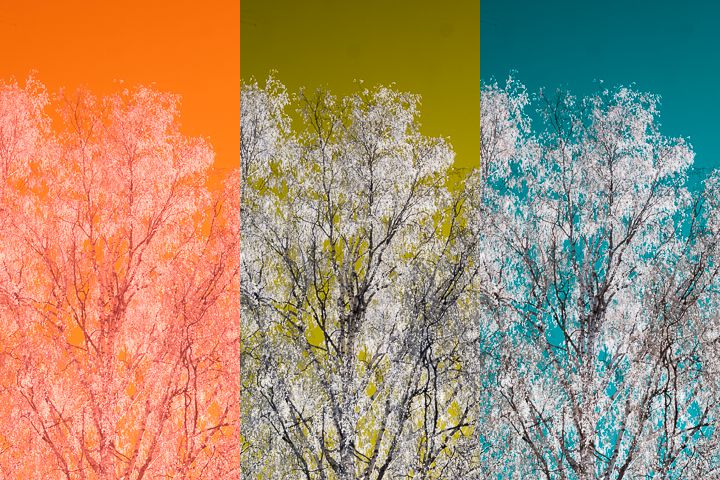
Here’s an example of a shot with 550nm filter, processed as follows, from left to right:

  1. Daylight white balance. The filter has a heavy orange tint
  2. Custom WB, autotone. The tint is gone and sky now shows as dark yellow.
  3. Profile: RedBlueSwap, Custom WB, autotone. Sky is now blue and you can start adjusting photo further.

irkoivu

While this is an old trick in Photoshop, you cannot do this in Lightroom by default. In order to create this effect, I’ve built special Camera Profiles which have color matrices with reversed components. The profiles were created using dcpTool by Sandy McGuffog.

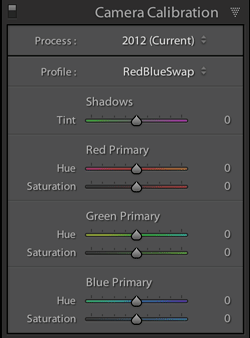
After installing the custom profiles, you will have a new option in Lightroom’s Camera Calibration Profile pulldown menu: RedBlueSwap. Selecting this option will reverse the red and blue channels and hopefully you can skip the slow “Edit in Photoshop” step.

lr_calibration_panel_redblueswap

Installation

Unzip the zip file and copy redblueswap folder to Camera RAW’s profile folder, which is located under your home folder:

Mac OSX:
/Users/yourname/Library/Application Support/Adobe/CameraRaw/CameraProfiles

Windows:
C:/Users/yourname/App Data/Roaming/Adobe/CameraRaw/CameraProfiles

After copying, you need to restart Lightroom before the new profiles are available.

Download

redblueswap_20150909.zip

Sep 20 2015: Updated to match cameras supported by Lightroom 6.1.1

The Fader 0.7.899

Another big update with support for gradual filters! And as always, some little bugfixes and improvements as well.

Starting with section checkboxes, they now indicate which sections of the preset are being faded. If the section checkbox is disabled, there is no settings for that sections in the chosen preset. It is quite helpful if you have partial presets (e.g. separate split toning preset, or just curves or…)

Fading of gradual filters is now supported, but as this is a bit of advanced feature – you need to know how the presets actually work. If there is no gradual filters in the preset, The Fader will keep the current values. So, to fade out current gradual filters, you just fade in “Reset Graduated Filters” preset, which I’ve written for this purpose.

Anyway, fading gradual filters also enables special tricks with Clarity, you can add multiple 100% clarity layers to create what I call “SuperClarity“, clarity effect that exceeds the 100% range of normal clarity slider. See photo below for example on this.

Download

Download thefader_r899.zip

Changes in version 0.7.899

  • Added fading of graduated and radial filters
  • Fixed accessing snapshots via virtual copy
  • Disable section checkboxes when chosen preset does not affect that section
  • Disabled preset caching, it caused updated presets no to do anything when
    fading

The Fader 0.6.890

Dead pelicanFading of split toning settings has always been the weak spot of The Fader, and since I’ve been using a lot of split toning lately, I decided to put some effort into improving it.

Firstly, there is now a proper interpolation algorithm for split toning hues. Earlier, it was just linear, now we are using it as an angular value. This means that if you have a split toning hue set to yellow and you are fading towards magenta, the slider value will wrap around 0 (slider left) to 360 (slider right).

Second improvement is the case when split toning hue is not set (hue 0, saturation 0) in the current settings, but you want to fade in a certain split toning effect. In this case, the hue value is now copied from the photo values, which allows smoothly fading in just the correct hue value. One case where this happens is fading of Lightroom’s built-in Zeroed preset.

Also, this release includes a spline computation fix where the result of a tone curve faded 100% to other curve would not always be exactly the same as you would expect.

And finally, I’ve added a registration reminder and removed the restriction of not being able to test fading of all presets in the unregistered version, now all preset folders are unlocked.

Download

Download thefader_r890.zip

Changes in version 0.6.890

  • New algorithm for split hue calculation
  • Fixed fading tone curves when fading smooth curve against linear curve
    would result in non-linear curve
  • Unregistered version now allows fading of all presets, but it has delay/nagscreen

Shuffles 0.1.931

ÅterspeglingHere it is finally, the plugin for creating shuffled collections and randomly picking develop presets!

Shuffles is a set of randomized operations for Lightroom, currently containing two different functions.

  • Apply shuffled presets allows you to programmatically apply random presets from a given preset folder. This adds a nice organic touch to the collection.
  • Create shuffled collection creates collections from chosen images, so that the photos are inserted in randomized order. It is useful for collections, where the actual taking order of the images is not meaningful, such as party shots and nature photos.

Download

Download shuffles_r931.zip

Version 0.1.931

  • Re-built, original was missing files

Ripping Photoshop Express presets

Few months back, I posted how to load Adobe Revel presets into Lightroom.

Since then, Adobe has revamped their mobile Photoshop Express application, it is now based on the same photo processing pipeline as Revel is. Most of the settings are compatible with Lightroom, and the presets are still stored as XMP files inside their application bundle.

Loading develop settings from XMP isn’t supported by Lightroom, but Preset Ripper plugin gets the job done.

There were about 20 interesting presets in addition to Revel presets and non-Lightroom stuff. Following is the list of Lightroom 5 renditions of those presets. (Here’s the original). Looks like “Bright” and “Cinematic” are very similar to each other.

Once again, you can load any of these presets into your own photo using the Preset Ripper plugin, either by opening the original XMP files, or by downloading any of these JPEG files below (right click, save as) and opening it in the Preset Ripper plugin.

PSX60sTVGrab

PSX60sTVGrab

PSXBright

PSXBright

PSXCinematic

PSXCinematic

PSXClassic

PSXClassic

PSXColorful

PSXColorful

PSXGlow

PSXGlow

PSXGrain

PSXGrain

PSXHighContrastBW

PSXHighContrastBW

PSXInfrared

PSXInfrared

PSXOrange

PSXOrange

PSXOrton

PSXOrton

PSXPinhole

PSXPinhole

PSXSepia

PSXSepia

PSXSepia1

PSXSepia1

PSXTheBlues

PSXTheBlues

PSXTwilight

PSXTwilight

PSXVibrant

PSXVibrant

PSXVingetteBlue

PSXVingetteBlue

PSXVintageII

PSXVintageII

PSXWarmVintage

PSXWarmVintage

PSXWhiteMist

PSXWhiteMist

JPEGrescan v0.1.846

Matkahuollon takaseinäI’ve added fast mode to my JPEG crunching plugin for Lightroom. The fast mode uses static scans file from jpgcrush by Loren Merritt. This also makes the plugin Windows compatible. jpegrescan script still requires Perl, so it is only available on Mac OS X.

Fast mode typically saves about 7% over Lightroom’s JPEG compression and the jpegrescans is maybe 8% savings, but it is a lot slower.

The original photo above is 9,549,175 bytes when exported from Lightroom with 100% quality. With JPEGrescan fast mode, the photo is 8,771,374 bytes, takes 2 seconds for saving 777,801 bytes without losing any quality. Full scan result is 8,719,224 bytes, but it takes 24 seconds on my Macbook (Core2 Duo from 2009).

Plugin should work with Adobe Lightroom 3.0 and later, on both OS X and Windows. (Windows version supports only fast mode.)

Download lrjpegrescan_r846.zip

Changes in version 0.1.846

  • Fast mode with Windows support
  • Show notification after export is completed (LR5 only)

QuickLook Lightroom plugin now in Mac App Store

QuickLook Lightroom plugin is now available for download from Mac App Store Unfortunately, I had to choose a new display name for the plugin (“LrCat Preview for Lightroom”), because apparently having two corporate trademarks for others does not count as a valid name in app store…

This is actually not a Lightroom plugin, but a Mac OS X QuickLook plugin, which allows you to quickly peek into .lrcat files before opening them in Lightroom. The new version supports also earlier Lightroom version catalogs.

Excessor 0.4.801

JuurakkoAdobe has released the final version of Lightroom 5, and while they have not yet released a new plugin SDK, there seems to be new methods available for plugin developers.

John R. Ellis found that there is “createVirtualCopies” method hidden in LrCatalog class, and this method seems to do what had to be done using keyboard event stuffing in earlier Lightroom versions. I’ve now updated the Excessor plugin to use this new method on LR5. Hopefully, it is more robust approach than event stuffing and looks like it is a bit faster aswell.

Additionally, this version comes with re-written Windows event stuffing. I am now using Win32 C++ code to create the keyboard presses for “Create virtual copy”, because there were numerous users with broken VBScript installations (long story short, if any installer registers VBScript.dll with wrong account, it ceases to function). Functionally, there should be no difference.

Download

Download excessor_r801.zip

Changes in version 0.4.801

  • On LR5 uses new API, which needs no keyboard event stuffing
  • Preset folder and copyname menu now remember previously set values
  • Added preference to disable completion notification (for advanced users)
  • LR3/LR4 on Windows: Rewrote keyboard event stuffing with native code,
    because VBScript seems to be broken on many 64bit systems.