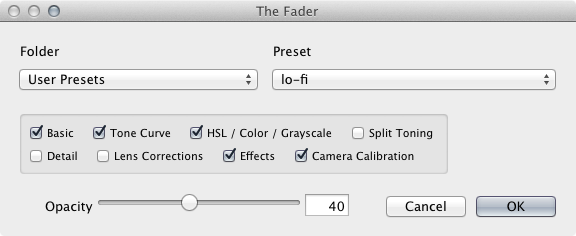
The Fader 0.5.796

TadpolesTime for another maintenance release of The Fader! This small update fixes issue with progress dialog locking up on screen, this was a rare problem experienced by some Windows users.

Additionally, the confusing lock icon has been moved and the registration dialog has indication what to type there, something that I should have improved long time ago.

Download

Download thefader_r796.zip

Changes in version 0.5.796

  • Reordering fader dialog, lock icon is now next to sections
  • Added placeholder value (“Paypal transaction ID”) for registration to indicate where
    the registration code should come from
  • Workaround attempt for progress dialog sticking on screen

The Fader 0.5.770

MirrorballCouple of weeks ago, I released a new important update for The Fader, which featured ability to toggle fading off for selected sections. I was so excited about the release, that I made a mistake of not testing if the toggle switch in “ON” position did actually work. Well, as noticed by Cindy, fading tone curves did not work at all. My apologies for the bug, it has now been fixed in The Fader 0.5.770.

Download

Download thefader_r770.zip

Changes in version 0.5.770

  • Fixed fading of tone curves, broken in previous version

The Fader 0.5.768

Version 0.5.768 had problems fading tone curves, which is fixed in version 0.5.770


KapeenkoskiNew version brings long-awaited ability to toggle individual slider modules on/off from fading, this allows e.g. keeping your lens corrections or split toning when fading.


Also, there’s some additional fixes to fading disabled sections (if you disable develop section from LR UI and then fade).

Download


Download thefader_r768.zip

Changes in version 0.5.768

  • Ability to disable fading of individual sections (registered version only)
  • Fixed disabled section interpolation which was using non-defaults if
    current photo had disabled sections
  • Registered version no longer shows lock icon (it was too confusing)
  • Added retina icons for future support

Adobe Revel presets applied in Lightroom

In addition to semi-pro Lightroom, Adobe also ships more casual photography package called Revel. While it is not terribly exciting for Lightroom users, it is interesting to know that it actually has the same processing engine as Lightroom 4. You might also consider revisiting it, because it has been recently updated with free subscription model.

What is quite interesting from Lightroom point of view, they have stored all the built-in presets as XMP files inside the application folder (on Mac, the path is /Applications/Adobe Revel.app/Contents/Resources/looks/ In order to access it, you need to right click Adobe Revel.app folder and select Show Package Contents)

XMP files contain the development settings and while Lightroom cannot directly load these files, my Preset Ripper plugin can! It reads XMP settings from JPEG or XMP files into develop preset values and uses plugin API to process the image to new settings.

Here’s a list of all presets I found there; the names are not the same ones shown in the user interface but there are some hidden presets as well (31 in total)

You can “rip” any of these presets into your own photo using the Preset Ripper plugin, either by opening the original XMP files, or by downloading any of these JPEG files below and opening it in the Preset Ripper plugin.

Atlantic

Atlantic

Austell

Austell

Bueno

Bueno

Carson

Carson

Corona

Corona

Mason

Mason

Moreland

Moreland

Murphy

Murphy

Olympic

Olympic

Parker

Parker

Porter

Porter

Prospect

Prospect

Savin

Savin

Shelby

Shelby

Spillman

Spillman

TestBlackenedRed&Green

TestBlackenedRed&Green

TestBoldDessert

TestBoldDessert

TestBrandon05

TestBrandon05

TestBrandon10

TestBrandon10

TestBrandon11

TestBrandon11

TestGlowMirror

TestGlowMirror

TestHotMidnight

TestHotMidnight

TestLilac&Lime

TestLilac&Lime

TestPalestSummer

TestPalestSummer

TestPinkGreenPale

TestPinkGreenPale

TestRedSoft

TestRedSoft

TestRedux

TestRedux

TestSunshine&Rain

TestSunshine&Rain

TestTinType

TestTinType

Venice

Venice

Willowbrook

Willowbrook

These photos were developed using Lightroom 4.3.

The Fader 0.5.718

La SantaLightroom develop presets have all kinds of hidden quirks in them. For example, if you use the toggle buttons to disable a certain section of a preset, the slider values are dimmed, and they are saved with their default values into the XMP sidecar file.

However, the actual slider values are still saved to develop presets, and until now The Fader hasn’t taken this into account. In case you have presets which have disabled sections in them with some wild slider settings, there is a possibility that The Fader could incorrectly interpolate these slider values. The revision 718 fixes this oversight.

Download

Download thefader_r718.zip

Changes in version 0.5.718

  • Improved processing of presets with disabled sections, now we are using defaults
    for disabled section values

Film Perforation 2012

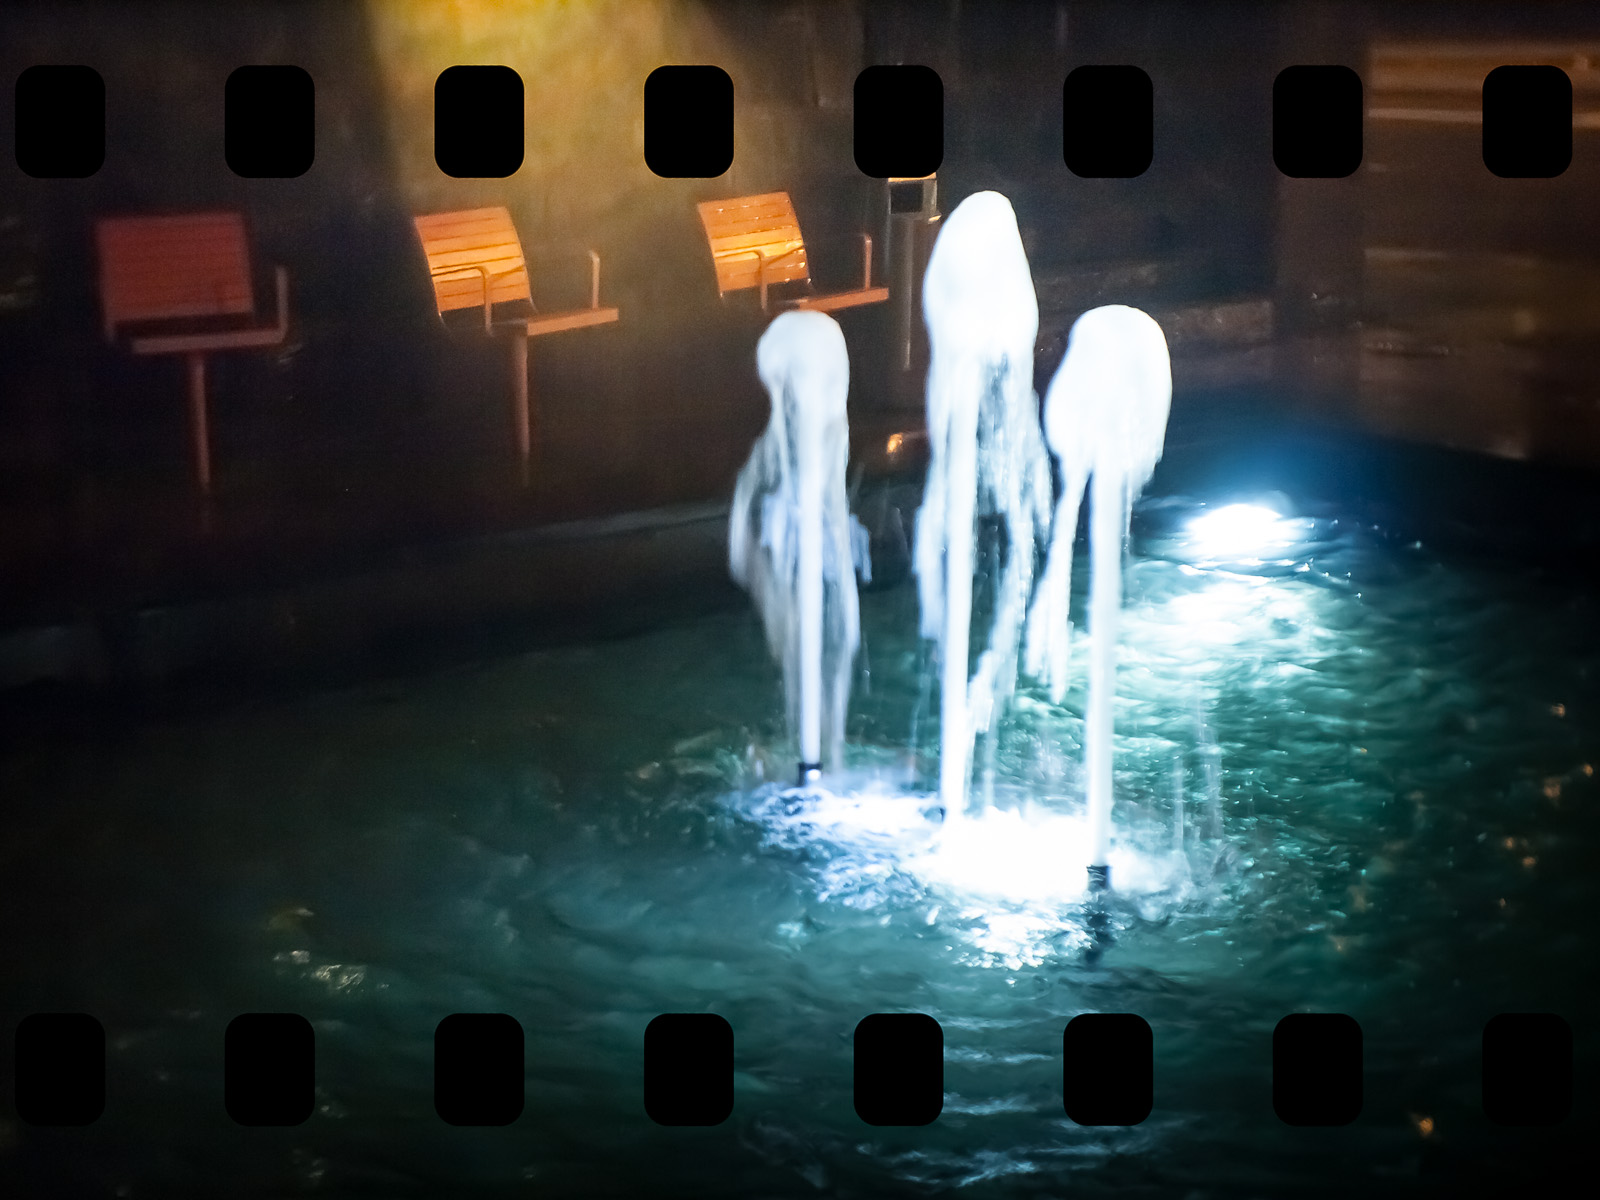
NaruHere’s a modernized, Lightroom 4 and Process Version 2012 compatible version of the LRPAD Film Perforation Preset. The preset emulates film sprocket holes by painting black rectangles on top of a photo using adjustment brush.

This preset is based on adjustment brush, but it is stored as a preset. Nice hack, when you consider that you can’t store adjustment brushes into presets using Lightroom’s user interface.

In addition to changing Exposure to Exposure2012, this preset has two layers of perforations, meaning that it can underexpose the film sprockets by over 8 stops, which should help with the bleeding problems experiences with the LRPAD’s preset.

Download

Download CaptureMonkey_Film_Perforation_2012.zip

RAW In-Camera Preview Extractor 0.1.705

MaisemaI don’t know about others, but my cameras’ preview images do not contain any useful metadata, such as orientation of the exposure.
I’ve now implemented this feature by examining the RAW orientation and losslessly rotating the camera preview JPEG according to it.

Now, the JPEG preview of vertical images should be vertical as well.

Download (Lightroom 4, Mac OS X only)

Download rawpreview_r705.zip

Version 0.1.705

  • Added rotation of JPEG image, based on the original RAW image EXIF orientation

Focus Mask 0.1.580

VanamoSmall linking update to Focus Mask plugin on OS X, it no longer requires X11 libraries to be installed (X11 is the old Unix windowing system, nothing a typical user should know about).

The previous version was accidentally using PNG library from X11, I did not realise that the library shipped by default on OS X is simply a stub with requester to install X11. Since X11 is typically only installed by Unix freaks and developers, I decided to link against a static version of PNG library.

Download

Download focusmask_r580.zip

This version contains error, it only works on OSX 10.8, not OSX 10.7 as expected.

Version 0.1.580

  • OSX version no longer requires X11 to be installed

Excessor 0.3.579

CourtyardOne user requested ability to select multiple images for Excessor, here’s update that makes it possible!

Apart from that, it now shares the same registration system as all my plugins, and the unregistered version has a slight delay, hoping to remind you that your support makes possible to create all these plugins.

Download

Download excessor_r579.zip

Changes in version 0.3.579

  • Re-branding
  • Added ability to select multiple photos
  • Added registration feature (removes nagscreen)
  • Added keywording and option to remove it

Leak Lite 0.3.576

Fake colorsI’ve finally taken the time to update Leak Lite plugin for Lightroom 4.0’s new process version. While the process version changes were not that big, the release was mostly delayed by a single bug in the create snapshot button. Myself, I’m usually clicking few dozen times on the shuffle button, and if there are some promising settings shown, I create a snapshot of those settings, and just shuffle a bit more, just in case… After I’m done with the shuffling, I go back to snapshots and decide which one is the to publish and do if necessary, I do some final retouching. All the effects are lossless, so you can adjust them with Lightroom’s built-in gradient tools.

Download

Download leaklite_r576.zip

Changes in version 0.3.576

  • Re-branding
  • Updated for Lightroom 4 and Process Version 2012
  • Added “Create snapshot” button
  • Added registration feature (removes nagscreen)
  • Added option to remove keywording

The Fader 0.5.560

Vanha makeistehdasYet another maintenance release!

I received some user comments related to missing LrPhotoPictureView namespace. This class is undocumented Lightroom class which provides UI photo preview and it is not supported by older Lightroom 3.x versions (I recommend running the latest version, 3.6, which does support this undocumented feature). And as you could see from the UI – I was not actually using it for anything, it was simply leftovers from some UI experiments I made.

Another change is in the tone curve interpolation, the lagrange interpolation makes the curve quite unstable when lots of keypoints are used, so I’ve done some additional research to make sure curves are now properly interpolated with the same algorithm Lightroom uses internally (hermite spline interpolation, as presented in book Numerical Recipes).

Download

Download thefader_r560.zip

Changes in version 0.5.560

  • Fixed “An internal error has occurred: Could not find namespace: LrPhotoPictureView” on
    older Lightroom 3.x releases
  • Fixed clamping bug in point curve
  • Replaced point curve lagrange integration with hermite spline

Focus Mask 0.1.535

I’ve updated the Focus Mask plugin with pick/reject buttons, which are very handy way to get rid of out-of-focus images.

Here’s my own workflow with Focus Mask. First, simply select the photos (shift-click, up to 32) and start Focus Mask plugin.

Click “Decrease Flag Status” button so that all the photos are in rejected state. Now raise the photos you see as good enough focus by clicking on “pick” or “unflagged” radio buttons (on Mac, you can also click the photo itself, its flag status is then increased). Clicking OK will make the pick changes permanent.

Download

Download focusmask_r535.zip

This plugin is only compatible with Lightroom 4. If you are running LR3, I could perhaps modify plugin so that a subset of the functionality would be available on Lightroom 3.x versions, but yet there has not been significant interest for that!

Sneak preview of focus peaking plugin

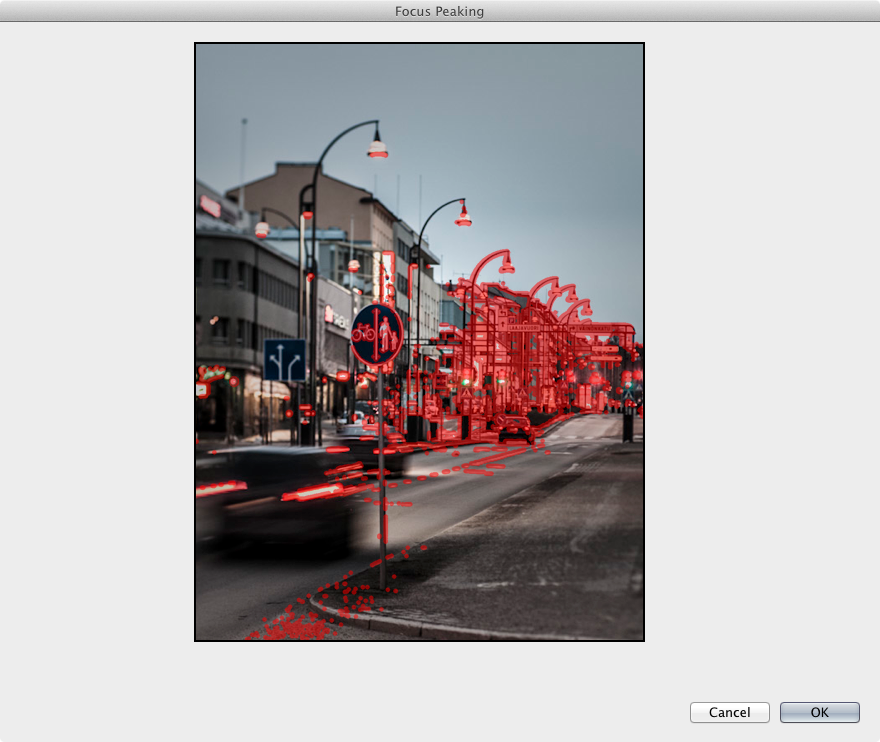
_4103785.jpgI’ve finally been implementing an old plugin idea of mine, showing in-focus areas in Lightroom. Nowadays, it seems to be called “focus peaking”. I’m processing the image and showing red dots where the suspected focus is in.

No downloadable version yet, it is still in prototype phase, but I guess the screenshots should speak for themselves:

Now downloadable


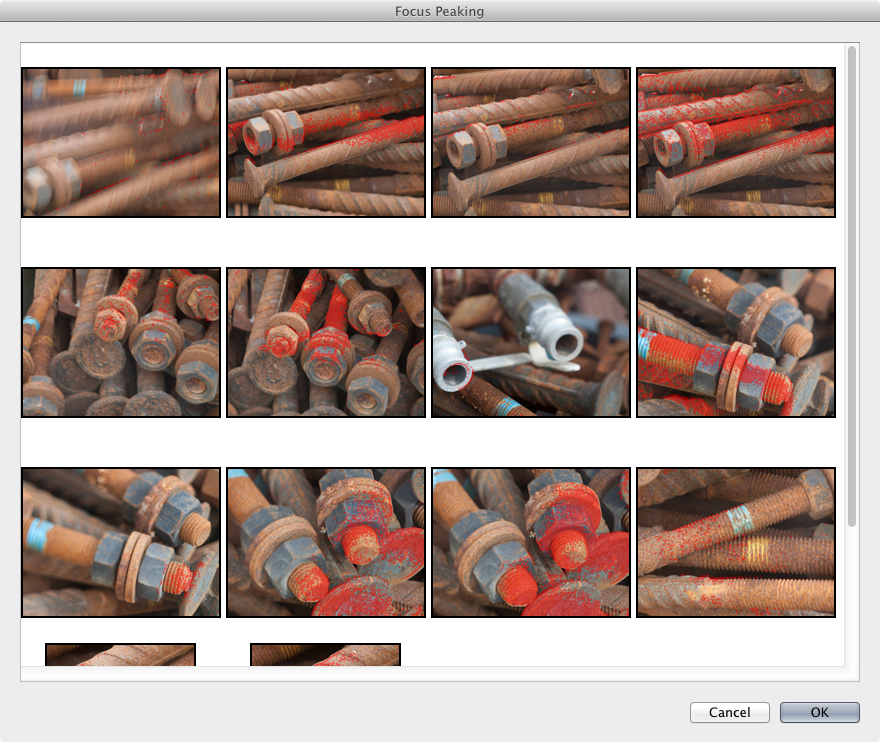
And of course, it supports viewing multiple images at once, so that you can see which images are in focus and which are not.


Currently, I’m missing cropping (focus mask is always shown from uncropped image), and ideally I’d like to add pick/reject buttons next to each image. But if there’s enough interest, maybe I could release it in beta version.

Sneak preview for improved Lightroom RGB curves editing plugin

Lightroom 4.0 finally added possiblity to adjust RGB curves, that is well communicated from the Lightroom evangelists (both paid and non-paid). What is not communicated, is that the curve editor itself is like a time capsule from the 90s!

Previous Lightroom versions contained the same point curve editor, where it was used to modify the intensity curve. The editor is quite minimalistic, it has possiblity to adjust the curve control points X,Y values and ability to set couple of preset curves (linear, medium, strong contrast). It is basic but does it job… except that the RGB curve mode loses the presets (ok, there is still Flatten Curve option, but that’s it!). And, I don’t really know anyone can make adjustments based on the individual curves: Lightroom 4 does not even show the RGB curves on screen together, you can only see one component curve at a time.

I’ve been working on a little plugin, which integrates to Lightroom 4, but allows a few tricks with the curves. On the left hand side, you can see a early screenshot of the plugin, the CurveMonkey is a working title, but those tend to stick around in my projects…

Most important feature is that you can see all 4 curves at the same time, and you can adjust them “live” with Lightroom, the changes are reflected to Lightroom instantly. I’ve added some necessary options to the context menu, so that you can select the most common curve presets and also copy and paste between the different curves (the bottom screenshot shows the context menu).

What is also included between the intensity and RGB curves, is a special gradient visualizing effect of the RGB and intensity curve combined. I got this idea few years ago, but I’ve never seen it in use in any image adjustment software, so perhaps it’s time to put the idea into good use!

The plugin is not (yet) ready for release, as there are some quite tricky bugs left, but it should be finalized shortly for Mac OS X release. Windows users will have to wait until June or so.

Let me know what you think!

The Fader 0.5.384

FrozenLightroom 4.0 was released today, congratulations for the whole Lightroom team for another fine release!

Also, I decided to release update for The Fader to just celebrate that 🙂

This update provides the ability to fade between point curves (you know, the flip side of Tone Curve section). As the curves are not really “fadeable” directly, I’ve cooked up some Lagrange interpolation and just increasing amount of control points as necessary.

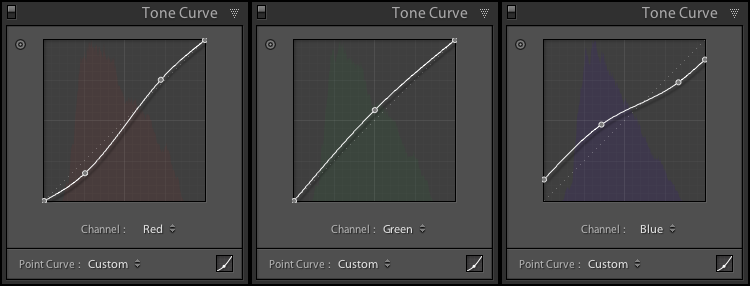
Here’s some screen captures — first the RGB curve settings of Lightroom’s built-in Cross Processing 3 preset:

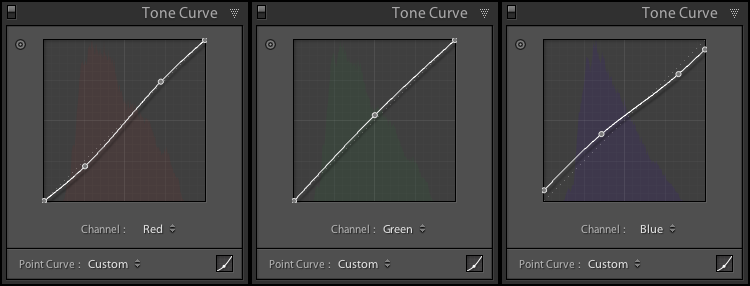
Now use The Fader to blend in 50% of Cross Processing 1 preset. This preset has a straight RGB point curve, which should straighten the curves a bit.

Final result:

And as always, this is applied using the non-destructive pipeline, so you can freely edit the settings further yourself.

Download

Download thefader_r384.zip

Changes in version 0.5.384

  • Support for fading tone curves (in PV2012 also RGB curves)
  • Fixed trashcan issue (again, it was accidentally commented out for debug)

Experimental noise texture layer for Lightroom

Lightroom does not have layers, and sometimes I’d really like to have noise textures applied on my photos. I figured out that although it is not possible to create presets with brush adjustments from user interface, it is possible to create preset with text editor that contains brush adjustments.

With handcrafted preset file, I can create a spot noise texture, like this (applied on a square 80% gray image). As you can see, the effect is very subtle here, but you can adjust layers parameters using the standard Lightroom brush adjustments.

Here’s the preset applied on a processed photo:

And here’s the same photo, but without noise texture layer. You really can’t see the noise texture, unless you know that it is there. I think this technique is useful, it adds a bit more character to some photos.

Finally, here’s the download link to Lightroom preset: CaptureMonkey_Spotty_Noise_Texture.zip. The preset works with both Lightroom 3.x and 4.x.

The Fader 0.5.370

Transparent ballpoint pen

Download

Download thefader_r370.zip

Changes in version 0.5.370

  • Support for Lightroom 4.0 Process Version 2012’s new basic sliders
  • Added warning sign when fading between process versions
  • Streamlined user-interface by removing extra text fields
  • Numeric input field, allows adjusting using arrows and steps (Windows pgdn/pgup, OSX: shift+arrow)
  • Much faster startup, preset lists are now cached between runs
  • Progress bar while presets are being enumerated
  • Added registration feature
  • Added option for tagging keyword LR_TheFader (registered only)